29 Sep 2016
At Q42 we love IoT. So much so that we’ve created a connected coffee counter, a remote controller for our Phillips Hue office lights and of course connected toilets. Needless to say we were very excited when Google asked us to help them building their IoT Developer Kit.

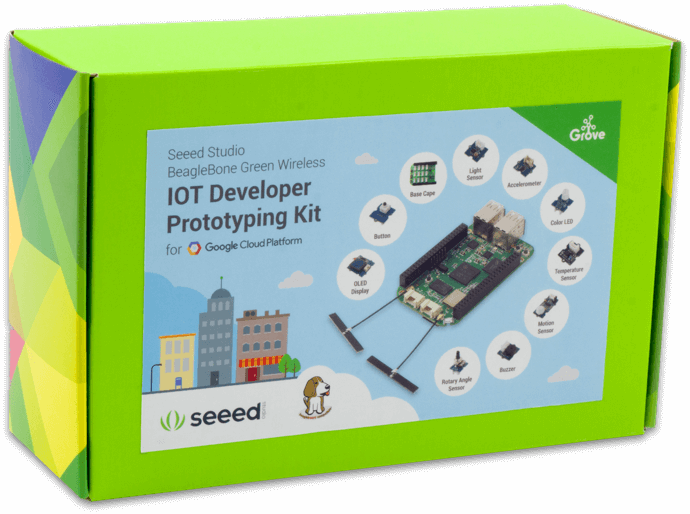
My First IoT
If you’ve always wanted to try this IoT thing but were overwhelmed by the options in terms of dev boards and cloud hostings, look no further.
Starting with a Beagle Bone Green Wireless, a variant of the popular Beagle Bone Black, you first add some sensors, like an accelerometer or a light sensor, and then you send that sensor data straight up into The Cloud. Once in the cloud, your data can be visualized in real-time on a webpage for example.
Easy duzzit!
So this kit, which has been available to developers worldwide for about a week now, will walk you through connecting the included sensors to the Internets. Which Internets? Well Google’s Cloud Platform of course :-)
What’s inside
If that has piqued your interest, here’s what you’ll find inside the kit:
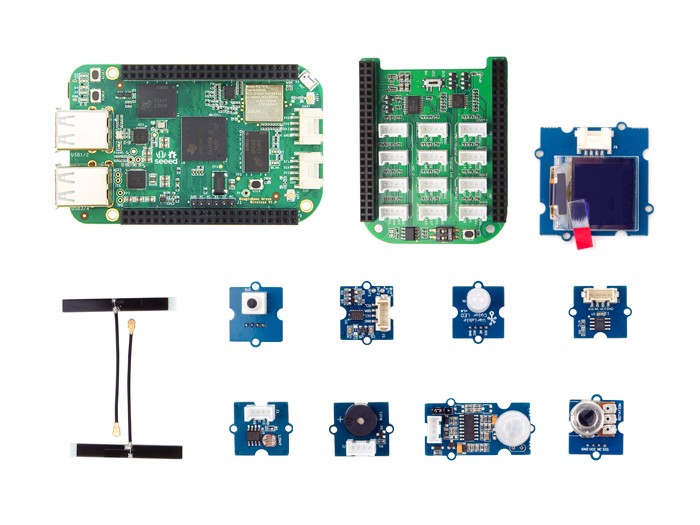
- said Beagle Bone Green Wireless
- 5 sensors: temperature, accelerometer, tilt, light, motion
- buzzer
- multi-color LED
- 96x96 OLED screen
- button
- Grove cables
- a Grove base cape
Where to get it
You can buy this puppy here and don’t forget to drop us a note if you’ve built something with this kit. Happy hacking!
18 Jun 2016
Here’s a short comparison I did of 3 command-line tools for uploading Lua and other files to your esp8266 via USB. In this test I’m only looking at tools to transfer files to a Lua-based nodemcu board. (not flashing the actual firmware like you do with the Arduino IDE)
(Tested by uploading a 2.8kb file)
Apparently, there’s a huge difference in the speed that these tools achieve when uploading files. The clear winner is nodemcu-uploader, which is 7x faster than nodemcu-tool and a whopping 27x faster than luatool.py
Combining the upload speed of nodemcu-uploader with my build script that only uploads changed files, your dev cycle is a guaranteed to be fast ;-)
17 May 2016
The problem
When writing Lua scripts for the nodemcu, I frequently need to upload new files. And since it’s so convenient that the nodemcu has an actual filesytem the number of files tends to increase rather fast. So if you’re like me, you’ll have dozen or so scripts and everytime you make changes to a few of them you’ll need to upload them again.
This is where it’ll start to hurt. As you’ll probably know, uploading those files is slooooww. It takes a few seconds to transfer for a script thats just a few lines long. And when you have multiple files that need to be updated in one go it can easily take 20 or 30 seconds. At which point you’ll start to cringe.. I know I did.
So I went on to explore some options how to optimize the process. Note that everything here was done using Andi Dittrich’s handy dandy nodemcu-tool.
Faster, faster!
One of the most obvious things to do is to increase the bitrate at which data is transferred over the line.
I changed it to a whopping 115200 instead of the default 9600 by adding this line at the top of my init.lua file:
uart.setup(0, 115200, 8, 0 , 1);
note: Also make sure to change the baudrate at which nodemcu-tool operates.
Result: although this was a trivial method causing an overall speedup, the improvement is marginal. It shaves of only 10% or so, causing me to think that there’s some time lost during the setup of the transfer or something.
Less is more
Another no-brainer is to limit the number of bytes that are being sent across the wire. Less bytes means less time. And nodemcu-tool has a nice option to ‘optimize’ files before they get sent. It does this by removing comments and reducing whitespace, a simple version of a process know to web developers as minifying.
Result: again, this technique too manages to shave off roughly 10%. Which is nice but not… great. Maybe you’d say I need to write more comments in my code, and you’d be right! ..but.. that won’t actually speed up the transfer now would it? :-P
A side-effect of this optimization is that when you get a run-time error, the line numbers are off. For this reason and because the speed-up was marginal I decided not to use this feature anymore.
Gulp to the rescue
Actually, at this point I was thinking of Makefiles but since they’ve somewhat fallen out of fashion I went for Gulpfiles instead. Gulpfiles are the kind of script files you feed to a tool called Gulp, but they’re written in Javascript really. And just like the Makefiles of yore, you can use ‘m to write your source transformations.
So Gulp lets you write tasks which get executed whenever you enter the following on the command-line:
gulp <my-task>
Now instead of compiling the source files, we could just run some arbitrary shell command to, let’s say, upload files to your nodemcu!
In code, it looks like this:
var SRC = 'src/**/*.lua';
var DEST = 'dist';

gulp.task('upload', function() {
  return gulp.src(SRC, { base: 'src' })
    .pipe(shell("echo uploading: <%= file.relative %>"))
    .pipe(shell("nodemcu-tool --silent upload --remotename <%= file.relative %> src/<%= file.relative %>"))
    .pipe(gulp.dest(DEST));
});
Some things to note:
gulp.src is a readable stream of files, meaning that files can be read from itpipe is used to define a transformation on those filesshell lets you execute a shell commandgulp.dest is a writable stream that takes in files and puts them in a directoy
Have you guessed what happens when you enter gulp upload? Exactly, all your Lua scripts will get transferred to your nodemcu.
Unlike make, gulp isn’t lazy unfortunately. That means it’ll upload each and every file whenever you run gulp upload. The reason is, I think, because gulp is mostly used in conjunction with a technique called file watching, whereby files are individually processed whenever they are changed on disk. That of course would totally obviate lazy execution but it doesn’t seem to be the right approach in our case.
A difference solution
Actually, there’s only a minor change we need to make to optimize the hell out of this. See if you can spot it:
var SRC = 'src/**/*.lua';
var DEST = 'dist';

gulp.task('upload', function() {
  return gulp.src(SRC, { base: 'src' })
    .pipe(changed(DEST))
    .pipe(shell("echo uploading: <%= file.relative %>"))
    .pipe(shell("nodemcu-tool --silent upload --remotename <%= file.relative %> src/<%= file.relative %>"))
    .pipe(gulp.dest(DEST));
});
The key is the line that says .pipe(changed(DEST)). It compares the input, which you recall is a stream of files, to the output of the previous run, the generated files in the ‘dist’ directory. Only files that are newer then their counterparts of the previous run will get processed this time. So, effectively only updated files are copied to the nodemcu!
Closing words
For me, this solution is a life-saver. I can just run the same simple command every time instead of hand-picking the scripts that have been changed. And the upload is normally done in a few seconds compared to 4x, 5x or 10x that when I just copy all scripts every time.
Even if you dont fully understand the part about Gulp and streams, don’t worry, I’ll bet you can just use the script as is and modify it to your situation.
Here’s the link to the full gulpfile. Note that you’ll need Node.js and npm installed. Also, although I haven’t mentioned it yet, this gulpfile uses several gulp plugins. These can be installed by running npm install in the same directory.
This technique should also be usable with different upload tools, such as luatool and nodemcu-uploader. In fact, it would be interesting to benchmark these tools and go with the fastest :-) Let me know if you have some findings to share.
Go ahead, give it a try!
UPDATE I’ve since switched to nodemcu-uploader for uploading files because it’s about 7x faster. I’ve updated the build script accordingly.
